
How to back up your iPhone

Before we start
Does it feel like your iPhone is starting to eat up too much storage? Now you can figure out why with CleanMy®Phone. It's our space-saving app that cleans up GBs of cluttered photo storage.

Download it for free on the App Store.
With its AI-powered tool, you can find and delete all duplicate and similar photos. Just a few minutes, and your iPhone is a perfectionist's dream. And yeah, it works on your iPad too.
Picture this: it’s the last day of your trip to Barcelona, and you decide to take a farewell selfie on the beach, and... there goes your iPhone with all your vacation photos, straight into the warm blue wave. Shock. Despair. Chaos.
Unless, of course, you have a backup.
Backing up your iPhone on a regular basis is the only way to save your data if something happens to the physical device. So whether it’s just your photos or a snapshot of your entire iPhone, make sure you have a reserve copy stashed somewhere safe. In this post we’ll look at the tools you can use to back up your iPhone and offer a step-by-step tutorial for each.
Before backing up the iPhone
Whatever you choose to back up your phone, you’ll be storing these copies somewhere — iTunes, iCloud, doesn’t matter. So a smart thing to do is to back up only the stuff you need. If you run a quick cleaning before every backup, you won’t waste storage on a bloated photo library or a dozen unused apps.
Declutter your digital space
Why back up 12K pictures, 2K of which are completely useless? Like shots that look almost the same or those photos of train schedules you took while traveling? A good tool to weed these out is CleanMy®Phone, an iPhone app that helps you find and delete unneeded pictures and refresh your digital space.
- Download CleanMy®Phone on the App Store.
- From the Declutter tab, tap Scan.
- Once the scan is complete, you’ll see folders like Duplicates, Blur, Screen Recordings, etc.
- Review the scan results and tap Clean to remove your photo clutter.

Remove apps you don’t use
In the spirit of cutting the clutter, take a look at all the apps you have installed. Is there a health tracker you haven’t opened in months? A game you downloaded and never got to play? Uninstall them to keep your backup lean.
Clean up other junk
Other useless stuff on your phone may include completed reminders, old notes, messages, call history, books you’ve read, podcasts you’ve listened to, and so on. Rummage around in your apps to clean out these bits and pieces.
So how to back up my iPhone?
Apple offers two options: back up your iPhone to the cloud using iCloud or back it up to your computer using iTunes. Alternatively, you can use Google Photos as a dedicated iPhone backup app for your photos, or try third-party backup software for Mac and Windows.
How to back up your iPhone with iTunes
iTunes may not be your favorite app, but it does the job. If you use a Mac it’s a default app you already have; if you’re on Windows you’ll need to install iTunes on your PC before you begin.
So here’s how to back up an iPhone to iTunes:
- Connect your device
- Open iTunes
- Select your iPhone in the left-hand tab
- Hit the Back Up Now button under Manually Back Up and Restore
- Click Done when the process is over
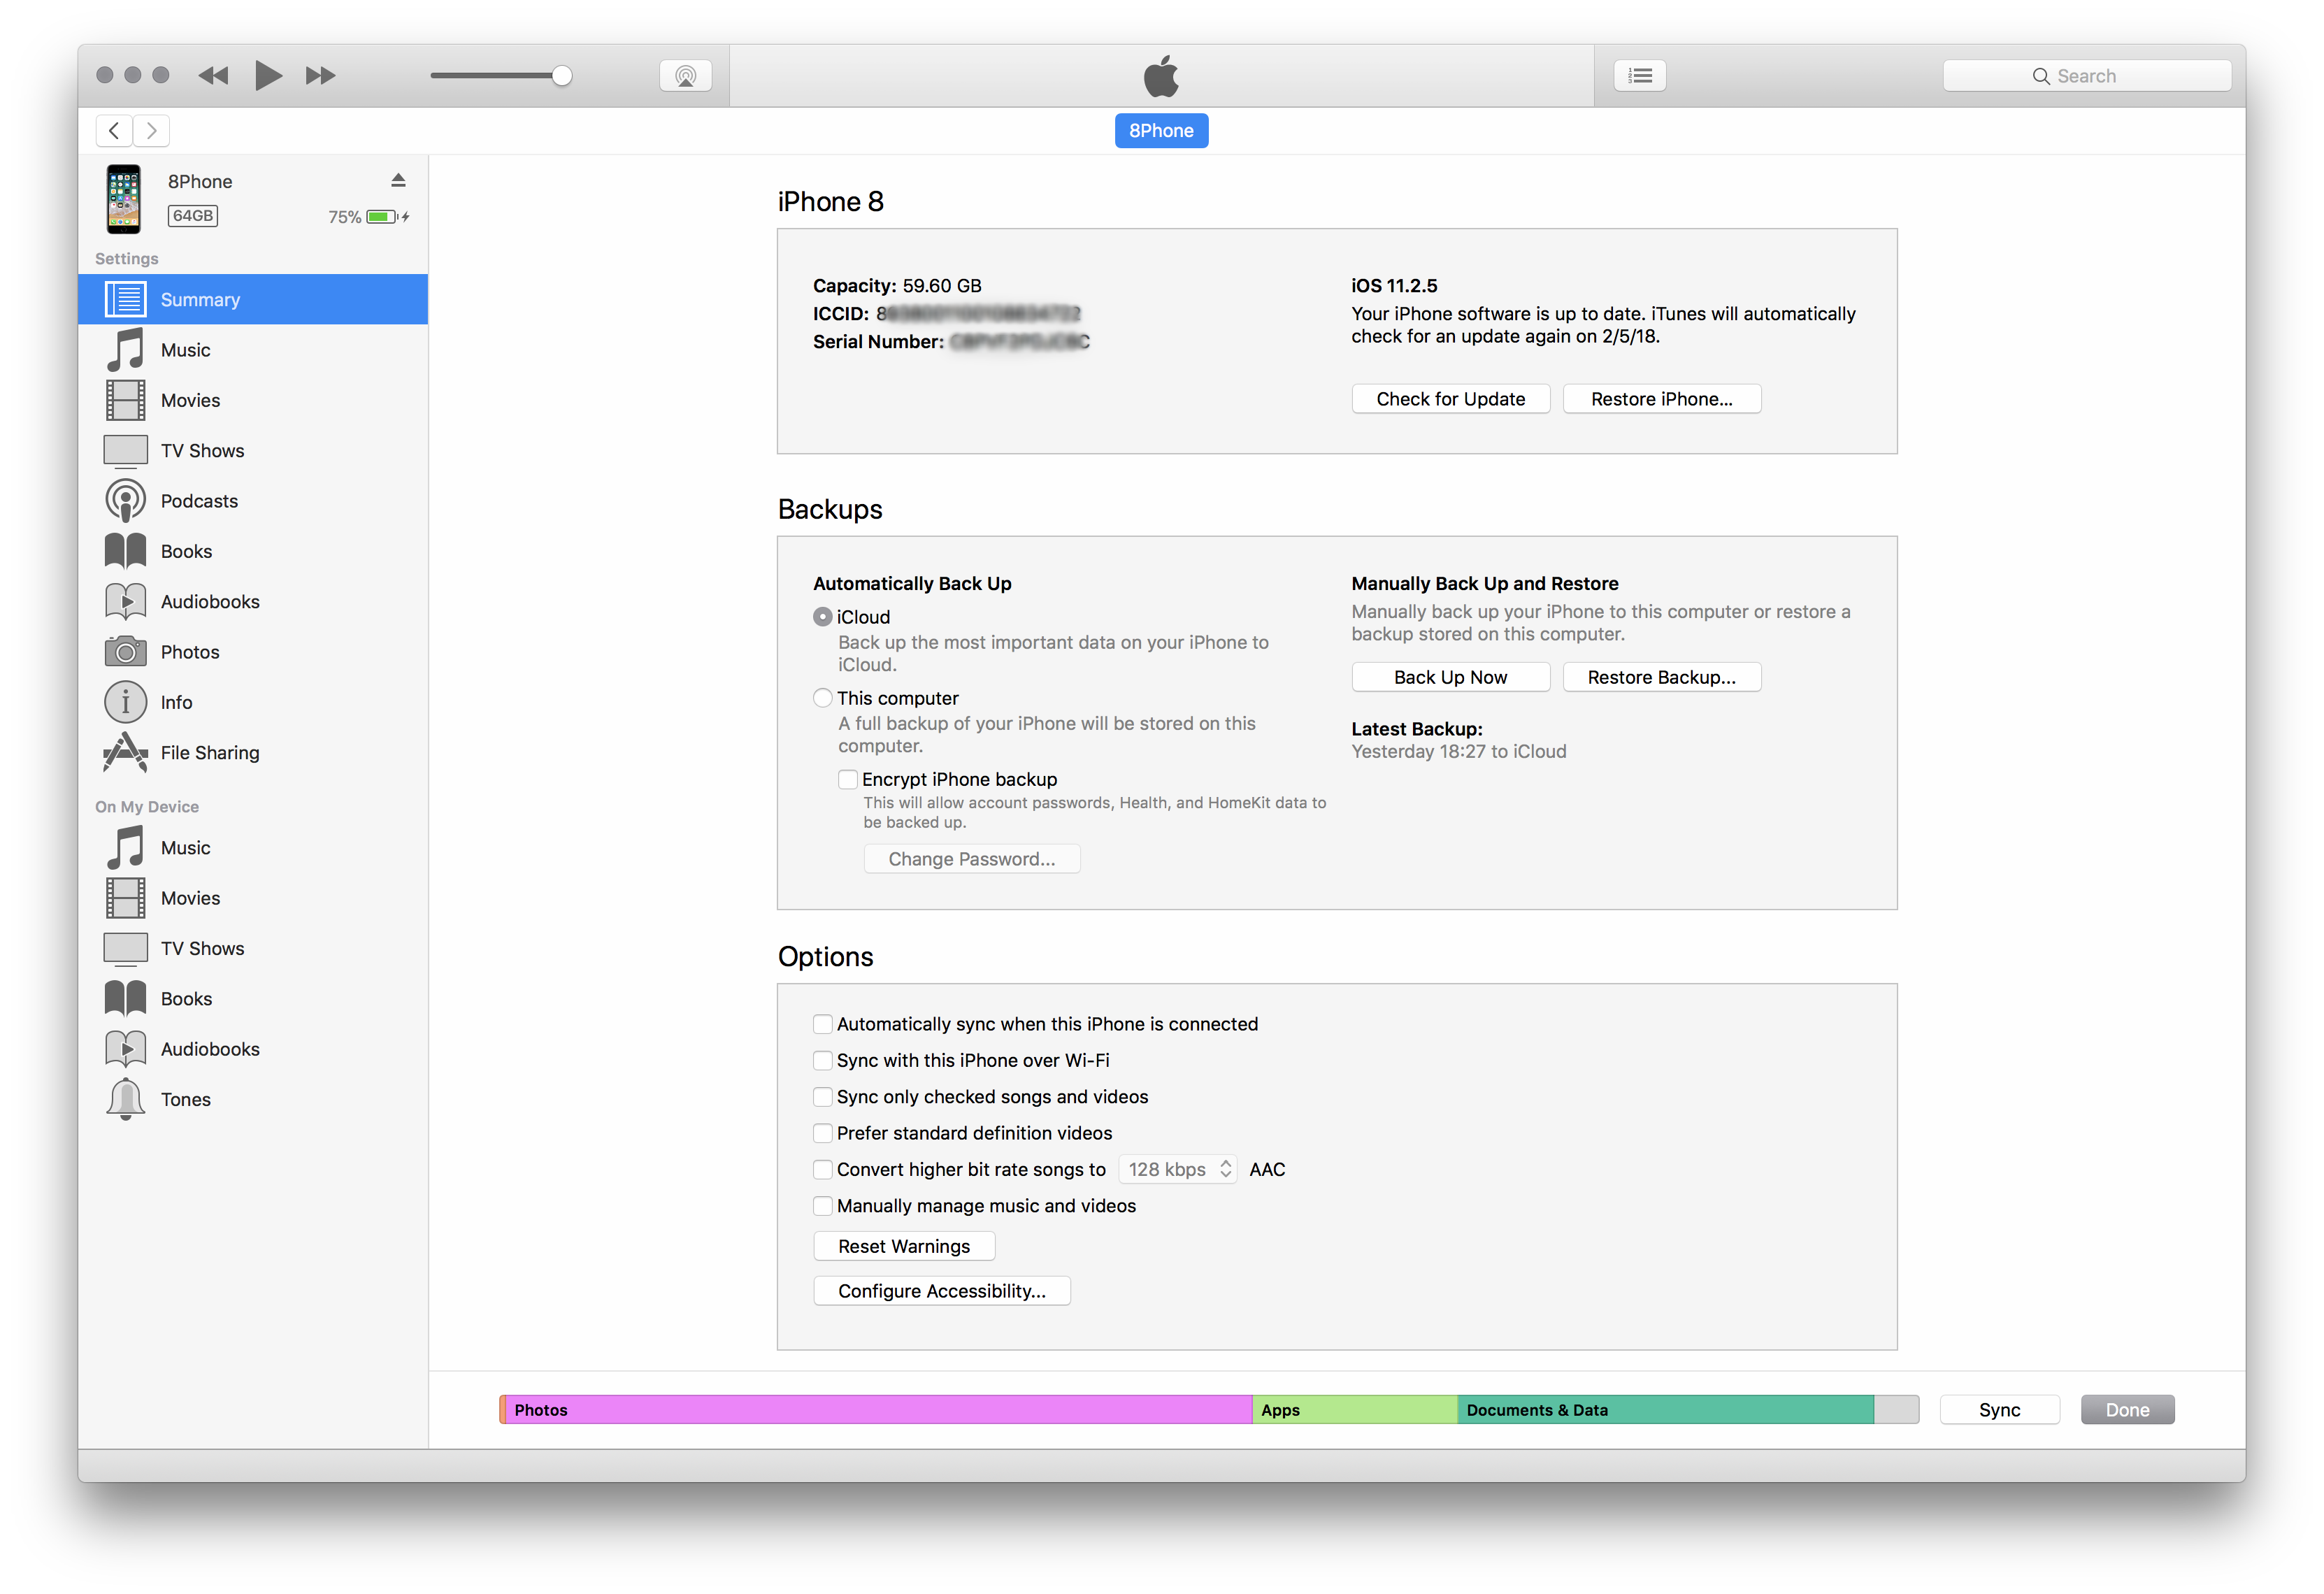
When you’re done you’ll see the info about your latest backup (date, location). Keep in mind that all backups you create (or iTunes creates every time you connect the phone, if automatic backups are enabled) will be stored on your Mac. They get outdated eventually, so you might want to clean out the old backups and keep just the recent ones. It’s easy to do that on Mac with CleanMyMac X: it has an iTunes Junk module that finds old backups along with other junk like broken downloads and lets you remove them in a click. Download CleanMyMac X for free and check it out, it’s very easy to use.
How to backup your iPhone to iCloud
If you have iCloud enabled on your iPhone, some of the data is already being synced to the cloud: iCloud Photo Library, Calendars, Contacts, Notes. When you back up your iPhone to iCloud, a copy of all the other data that’s not usually synced is saved to your cloud storage. You can do backups manually or allow iCloud to make an automatic backup every day.
Here’s how to back up iPhone to iCloud:
- Connect your iPhone to Wi-Fi
- Open Settings, tap your name, and then iCloud (for iOS 10.2 or earlier, go to Settings > iCloud)
- Tap iCloud Backup (Backup in iOS 10.2 or earlier)
- Switch on the iCloud Backup toggle control
- Tap Back Up Now
Stay online and wait for the process to complete. When it’s done you’ll see the date and time of your latest backup.
Now, if you have that toggle control from step 4 turned on, iCloud will attempt to automatically back up your data every day. For a successful backup, make sure you do the following:
- check if you have enough iCloud storage
- connect to Wi-Fi
- connect the iPhone to a power source
- lock the iPhone’s screen
You can do that every evening, for example, and have peace of mind knowing a reserve copy of your data will be created overnight.
Google Photos backup (photos only)
A solid way to back up iPhone photos is Google Photos. It offers a lot more free storage than iCloud (unlimited for High quality uploads and 15 GB for Original quality uploads), so if you only care about saving your pics and videos this is the way to go.
Here’s how you back up iPhone photos with Google Photos:
- Install Google Photos and launch it
- Log in to your Google Account
- Tap Menu at the top
- Go to Settings > Back up & sync
- Switch on Back up & sync
Be sure to allow the app access to your Photos when prompted. Now all photos you take will be automatically synced to Google Photos, where you can view and delete them.
Third-party iPhone backup app: iMazing
iMazing often claims to be a more advanced (and more convenient) version of iTunes, and it’s the app I use to back up my own iPhone. The process is pretty straightforward:
- Install iMazing for free and launch it
- Connect your iPhone to the computer
- Click Back Up in the Actions Panel
- Choose the location for your backup and tweak other settings if you want to
- Click Done
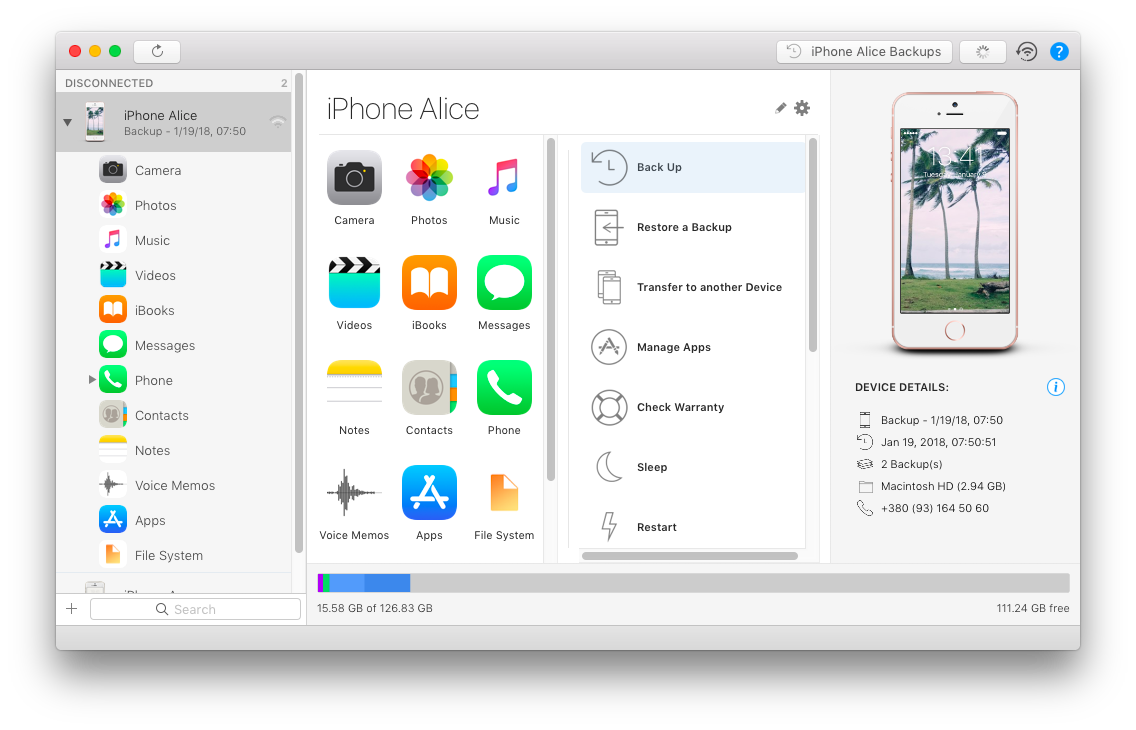
That’s it, all your iMazing backups will appear in the app, so you’ll easily pick the right one and restore it if need be.
Now you know your options and can pick the best way to back up photos, contacts, apps, and all the other vital data you have on your iPhone. Because stuff happens, phones drown, and these incidents are way less stressful if you have a recent backup.